
Over the past few months, I’ve gotten a few messages asking for help getting started doing freelance work, particularly music and voice acting. I’ve only started doing voice acting recently myself, but because of my history of marketing myself as a freelancer for singing and game audio, I already had a lot of tools at my disposal to network and get some roles.
For a lot of you, that might not be the case. So I’d like to set out some tutorials for you to help you get started.
Note: I’m still new to being a freelancer. All the things I’ve learned are from a mixture of attending lectures, talking to relevant people, reading literature and from my degree. I’m no means an expert on website development, marketing or social media. It’s all been a journey of trial and error. All these tutorials are a means to share what I’ve learned and hopefully make it easier for a lot of you to get started.
This tutorial works on assuming that you already have content to draw from to then build a website for. If you’re new to the area you want to work in, I highly suggest actually trying to produce work or get training on your chosen field before making a website. A website is like an advertisement for you, but if you don’t have anything to show, people won’t know if you’re good enough for the job.
Although I personally don’t have any of my voice acting work on my website yet, it’s because of my examples of my previous music work and my good functioning website that’s easy to maneuver, that I get roles. Also because of friends I’ve made in industry. But I’ll cover that in another tutorial..
Right so, home from your day job? Got a few hours to spare? Put the kettle on and lets get started.
Research
Before getting excited over the idea of having your own website, you need to do some research first. For whatever creative industry you want to be involved in; do you want to be a composer, a voice actor, an artist? You need to find the websites of the people in the field you want to be a part of.
Look at how their websites are laid out, what content do they have, what do they write about in their blogs, do they even have a blog?
Bookmark several of the websites you come across, as you can draw from them when it comes to putting your own together.
Researching other professionals websites will help you also to see what’s expected of you to show for future employers. If I was someone looking to hire you for a role, and I went on your website and didn’t find it easy to find access to your social media pages, or if I didn’t find it easy to contact you, you might not get the role I’m offering! It’s really important to have a website that does it’s job – and that job is to advertise you.
Buying a Domain Name
All the website work I do, I do via Dreamhost. Dreamhost is a well-known website that hosts your websites, and has been doing so since the 90s. I used it as it’s what my mother used for a module at university where she had to make a website, and that was back in the modem dial up days. There are a lot of other hosting sites out there, but for the sake of my tutorial, I’m going to show you how to use what I use, but feel free to shop around. Load up Dreamhost and create an account.
A domain name, according to Wikipedia is, ‘an identification string that defines a realm of administrative autonomy, authority or control within the Internet.’ Or, in layman terms, the name of your website. My domain name is, ‘littlerecordgirl.com’.
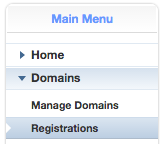
When logged into your Dreamhost account, click ‘Registrations’ on the second left sidebar, and this screen will show up.
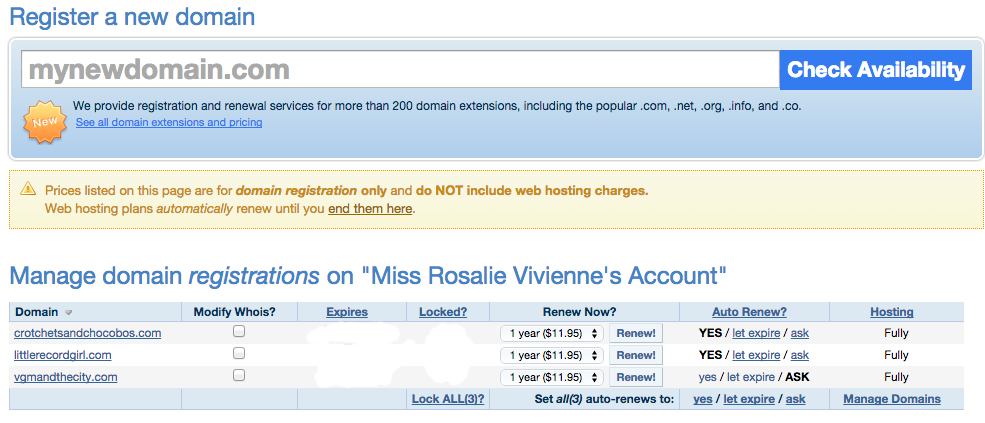
In the box where ‘mynewdomain.com’ is written, click on it and type in your desired domain name to see if it’s available or not. When it comes to the name of your site, you’re usually safe and better of using your name. For example, if I went with my name, I may try ‘rosalienewcombe.com’, or ‘rosalienewcombe.co.uk’.
Some musicians add the word ‘music’ to the end of their domains, so mine would be, ‘rosalienewcombemusic.com’.
If it’s voice acting you’re making a website for, from my research, which you would of done too if voice acting is your chosen field, you could add ‘vo’ to the end of your domain, so again, for example, mine would be, ‘rosalienewcombevo.com’.
It is entirely up to yourself, but make sure it makes sense. It doesn’t need to be interesting or flashy. If you’re wondering why mine isn’t a name, but a brand name, it’s because that my site isn’t for one specific field. Although I am a freelancer, I do various different things from singing, composing, voice acting and performing. I also come from a background of being in bands, especially during college, and making up names was the best part.
I chose ‘Little Record Girl’ from the lyrics of Thin Lizzy’s Rosalie, and liked the idea of it being my internet alias and brand name that encompasses everything that I do. If you’re someone like me who does a bit of everything and wants to advertise as such, a brand name can be more useful than using your own name.
Once you’ve chosen a domain name that’s available, fill in the required information, then continue to the next page. Chose how long you want to renew the domain for. After a year, the domain can be up for grabs from anyone else and you’ll want to avoid this, as it’s common for people to buy domains just to sell them back to you at a profit to themselves. I auto renew my sites after every year to avoid this from happening.
Buying a Hosting Plan
To get your website online you’ll need a hosting plan! Which you can also get via dreamhost. Hosting just means that you’re giving money to a website, in this case Dreamhost, to store your html files on their server. Think of it like a storage facility for what’s on your website.
On the left sidebar, under domains, click ‘manage domains’. Here your new domain name will now be visible on the screen. You should see the titles, ‘domain, registration, web hosting, secure hosting, email and actions.’
Under ‘actions’, click on ‘add hosting’. On the next page, select ‘upgrading to our Happy Hosting billing plan.’ The name is confusing, in fact, this whole bit to me was very confusing but luckily I found this helpful information here. I ended up also contacting Dreamhost directly to ask if I had set this all up correctly, and that’s when I knew I made a good decision by using Dreamhost as it’s some of the best customer service I’ve ever dealt with in my life.
Same can be said about WordPress’s customer service, which we’ll be using to design how your website looks. More on that later.

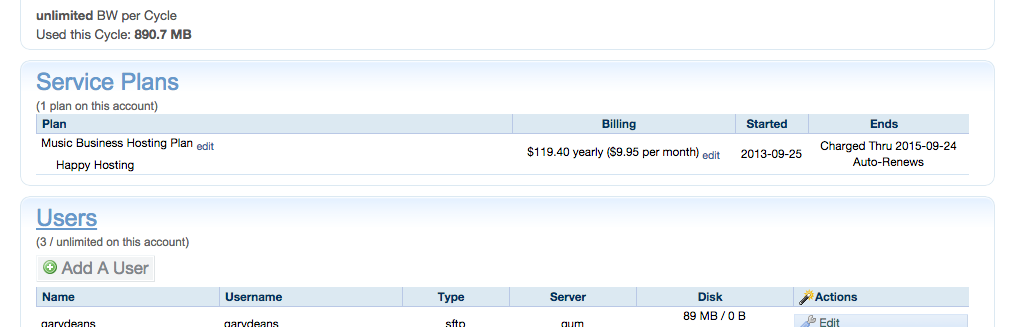
Now, add a hosting plan to your domain. I chose to pay mine annually. Name it something, anything. Mine is called, ‘Music Business Hosting Plan’, just so I remember what it is when looking at the overview of my Dreamhost account. For more on business management, check now this pay stub template free software.
So now you have hosting but it’s not set up yet! Go to ‘manage domains’, and there should now be a little green icon with the word ‘add’ after it under the web hosting title. Ignore all the options on the next page, apart from ‘add www’, you want to make sure that’s selected. Then un-select Google Apps and click on ‘fully host this domain’ at the end of this page and you’re done! Your website is now fully hosted.
There you have it, you have done the first steps to setting up your website! (Now that doesn’t sound patronising at all…)
Bet you’re wondering when do we get to the fun part. The part where we chose how snazzy our website looks and write about how awesome and hirable we are! Well, that’s in my second tutorial which is coming soon. Feel free to follow this blog to be updated on when the next tutorial will be made available!